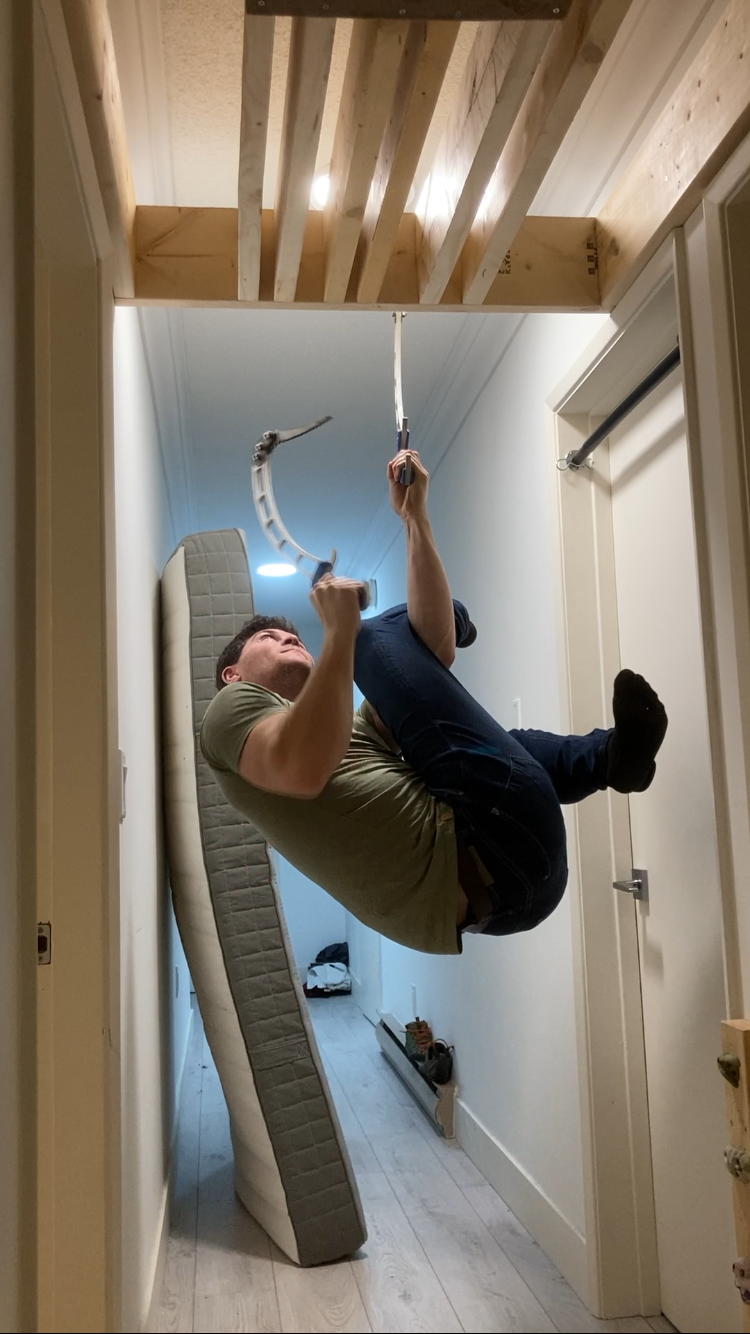
Custom Ice Tools
Skills Involved

Project Management
Setting design requirements based on use cases, managing budget, sourcing materials and tooling

Mechanical Design
DFM, CAD work in Fusion 360, FEA in Fusion 360, iterative parametric design and modeling, material selection

Manufacturing
Waterjet construction, tempering and annealing of tool steel, drill press, belt sander, hand tools, 3D printing
What are Ice tools, and why Build them?
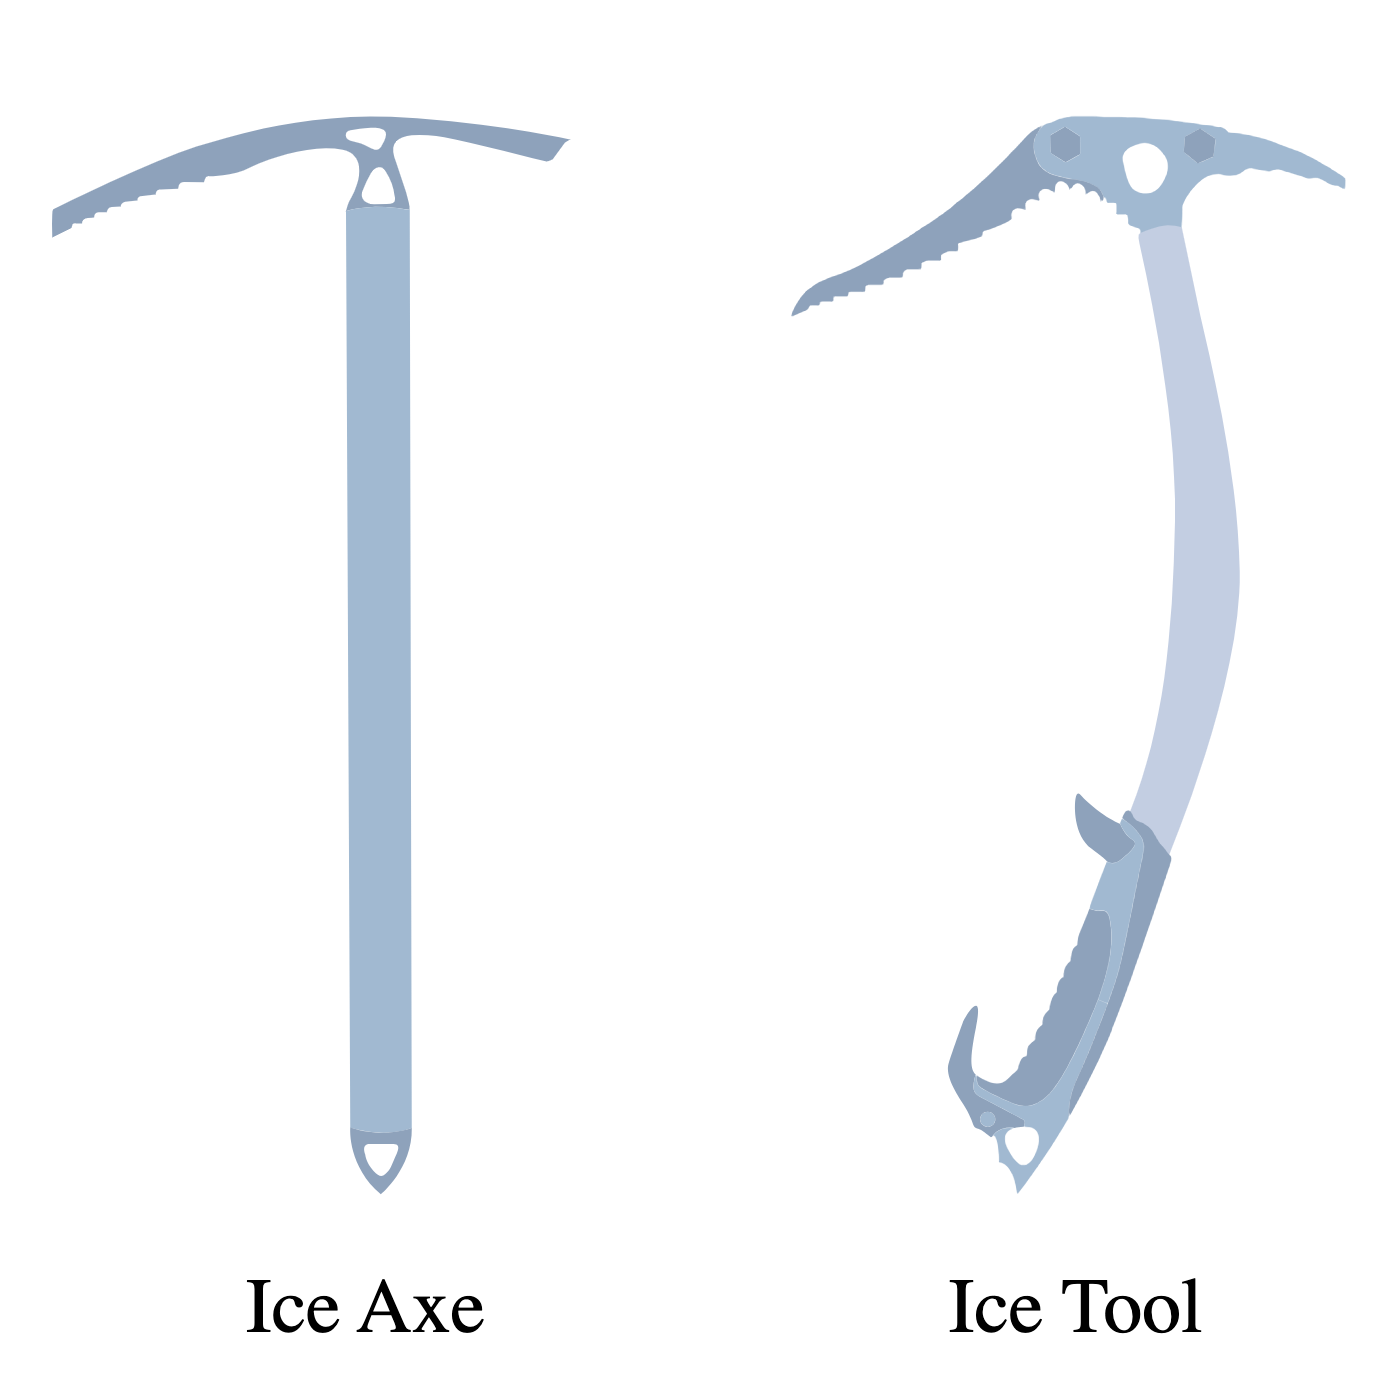
What are Ice Tools?
Ice tools are used in mountaineering and ice climbing to ascend steep or vertical ice. Ice tools differ from ice axes, which are primarily used for glacier travel or steep snow.
Why Build Them?
Building ice tools was a great challenge! It required me to rethink their design to meet the constraints of my manufacturing capabilities and budget. Additionally, I needed to learn to use the Fusion 360 FEA tools to allow me to design tools that meet my requirements while being lightweight and cost-effective.
(Source: OutdoorBlueprints)
How to build an Ice Tool
(Source: UIAA)
Set Requirements and Constraints
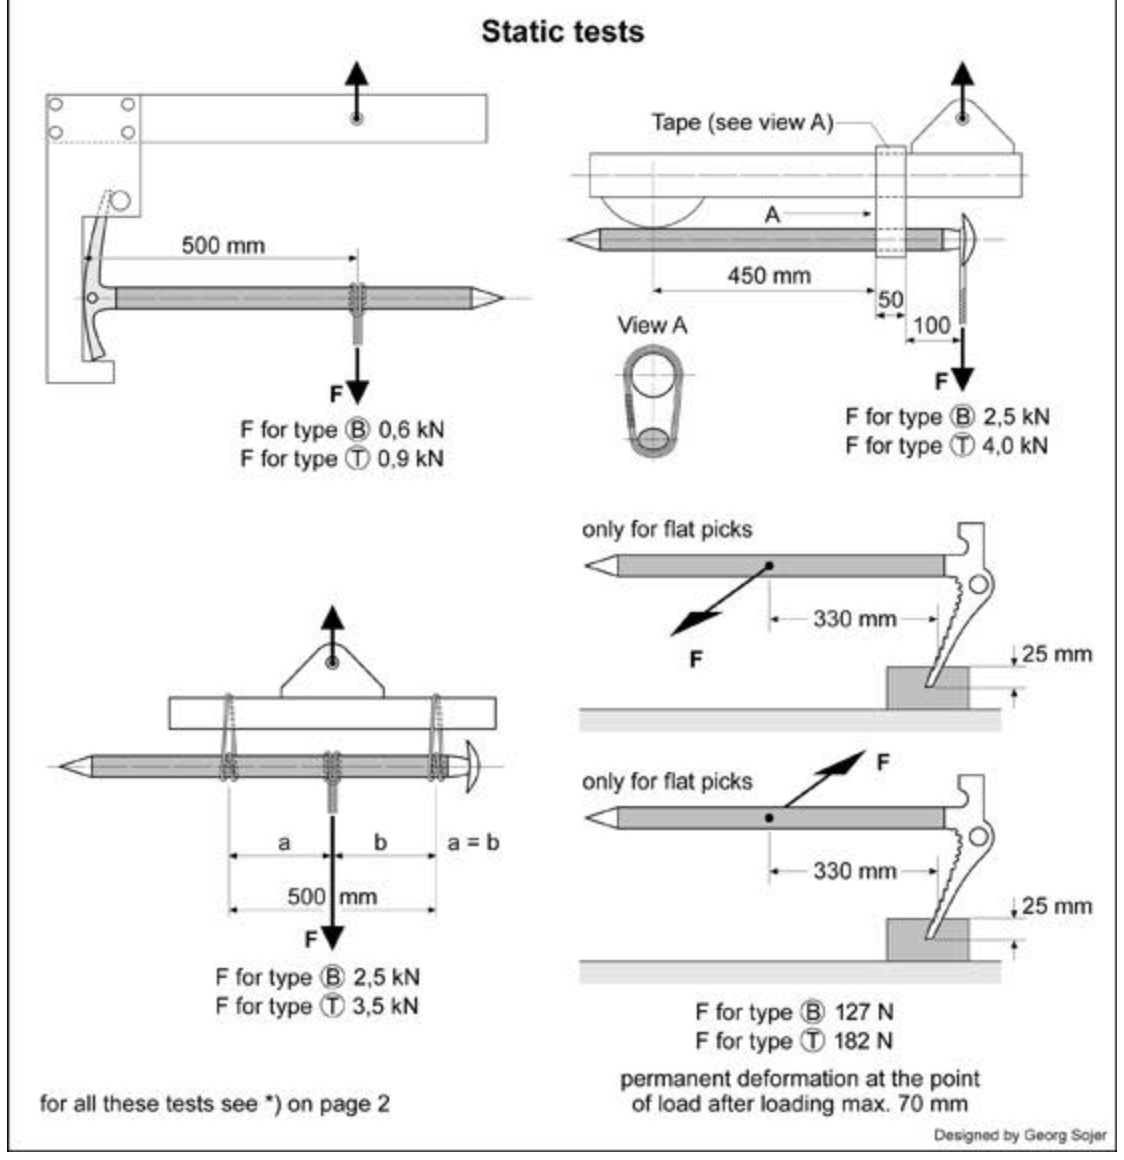
Ice tools are highly technical pieces of mountaineering equipment. They must be strong, durable, and lightweight. For my project, I want to create tools that function at a similar level to commercially available options. Ice tools are certified to one of two ratings: Basic or Technical. While it would be great to meet the Technical rating I will only be using these for basic ice climbing which does not need the same level of strength.
Requirements
- Strength – Taken from T rating certification
- Can support 1kn in the two standard pull directions while in use
- Durability – Based on comercial options
- The pick is not damaged by repeated impact into ice
- Usability – Based on experience with existing ice tools
- Ergonomic to hold and swing
- Insulated handle
- Picks are replaceable
- Picks are resharpenable with hand tools
- Weight – Based on heavier end of commercial options
- Under 700g each
Constraints
- Cost – Commercial tools run between $250 – $450 each
- Under $200 each (Unfortunately I’m still on a student budget)
- Manufacturability
- Must be able to manufacture it in a student run shop space
Basic Design
Ice tools evolved out of ice axes as mountaineers required more technical equipment for steeper ice. They normally consist of a pick to cut into the ice and a curved shaft with a handle for the climber to hold on to and swing the tool.
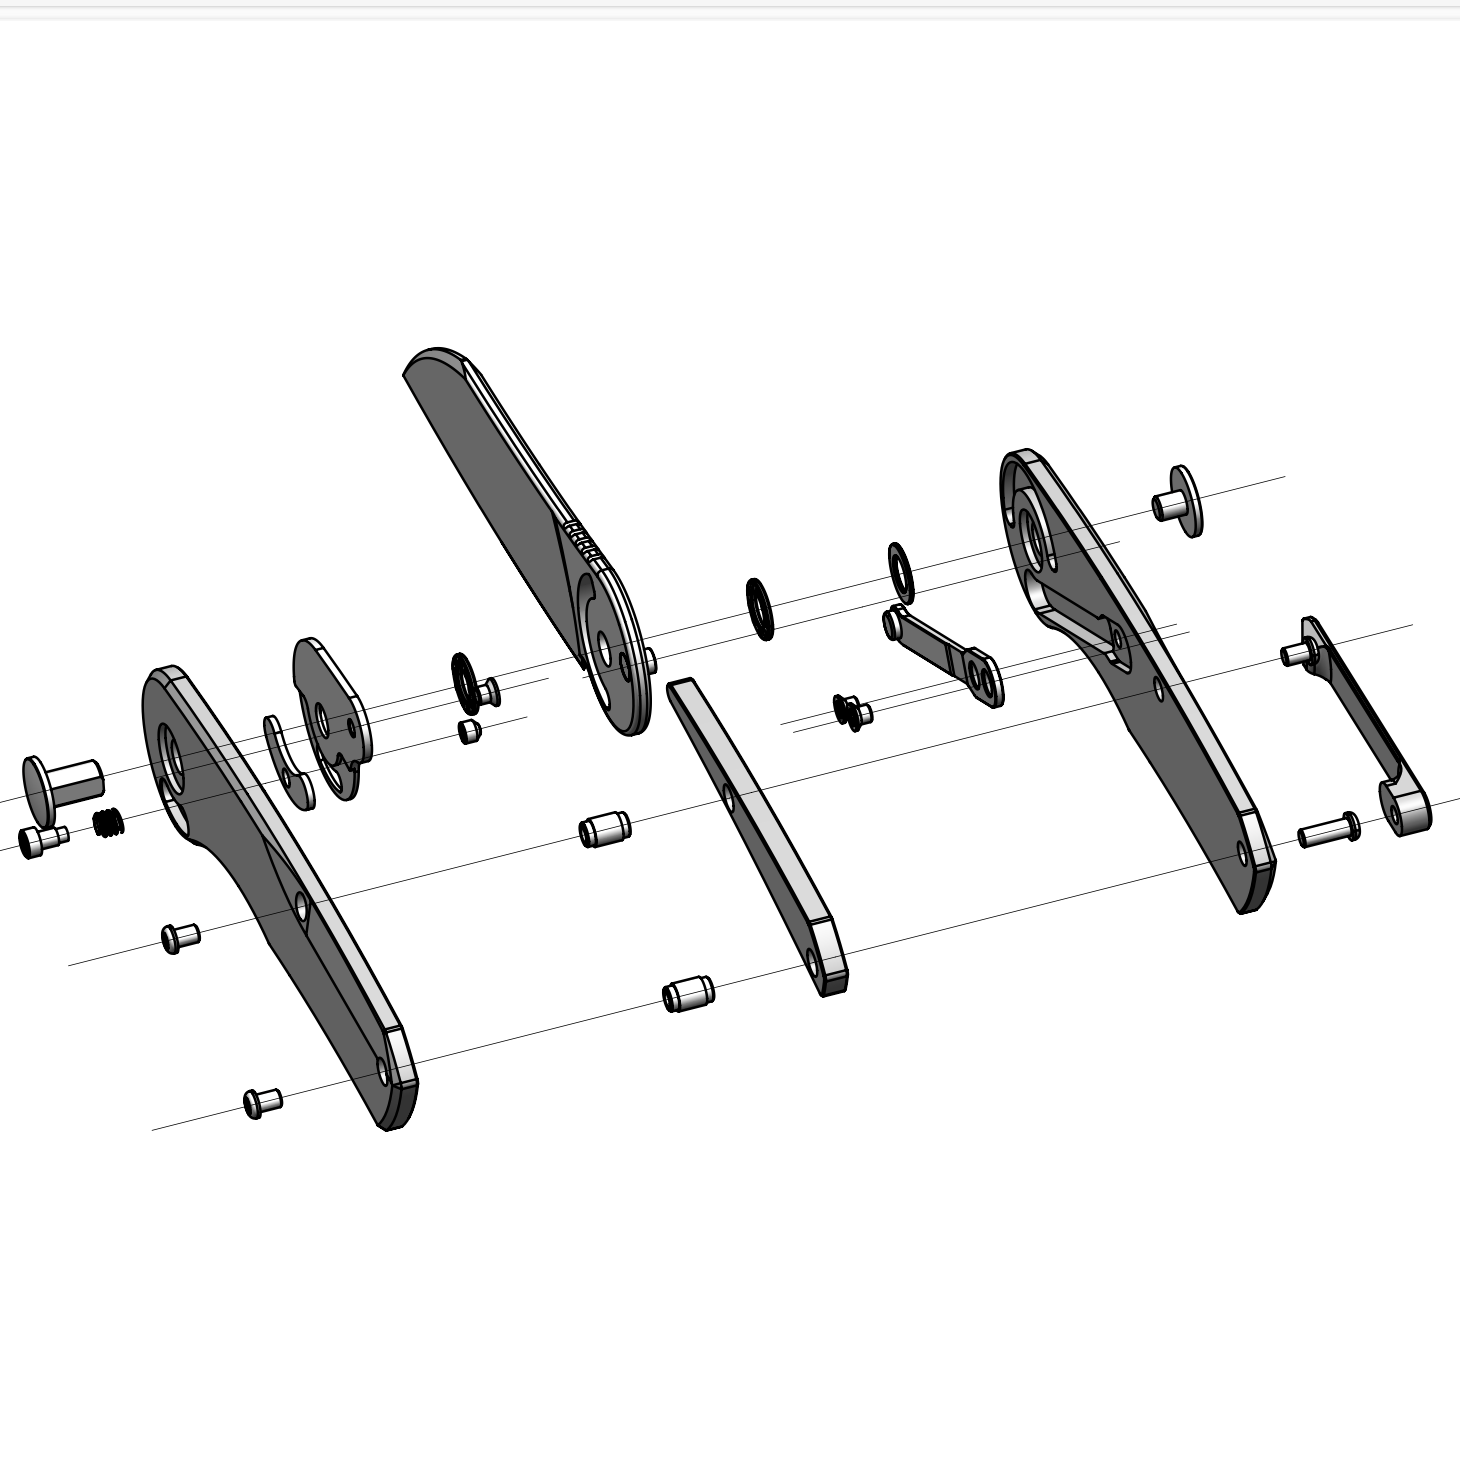
Design for Manufacture
Most commercial ice tools are made through hydroforming of aluminium tube. Premium options are CNC milled, die cast or use carbon fiber laminate construction to reduce weight. Since I am only making one set I want to avoid manufacturing methods that require dedicated tooling or excessive fixturing. These constraints coupled with my budget lead me to consider a flat plate construction which can be waterjet cut and bolted together.
(Source: Petzel)
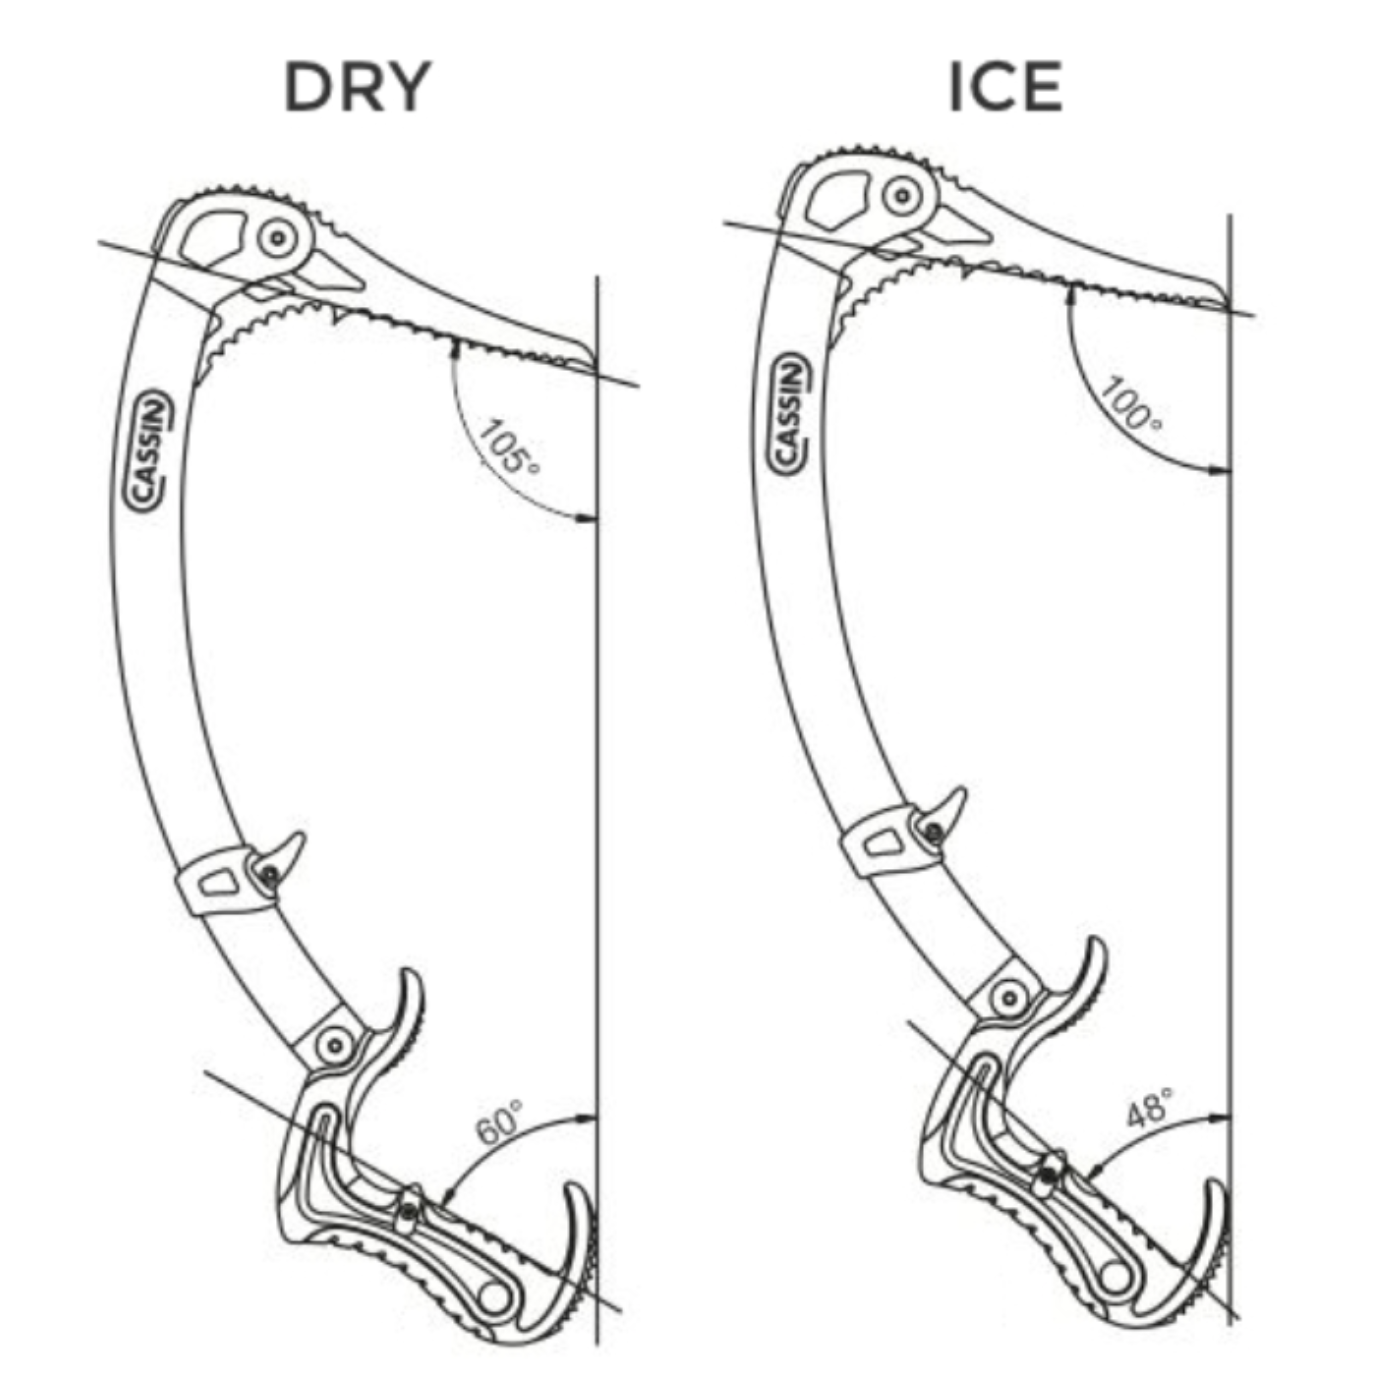
Geometry
Ice tools have several key geometries that impact the effectiveness and ergonomics of the tool. These geometries can be found by referencing existing tools or manufacturer data sheets
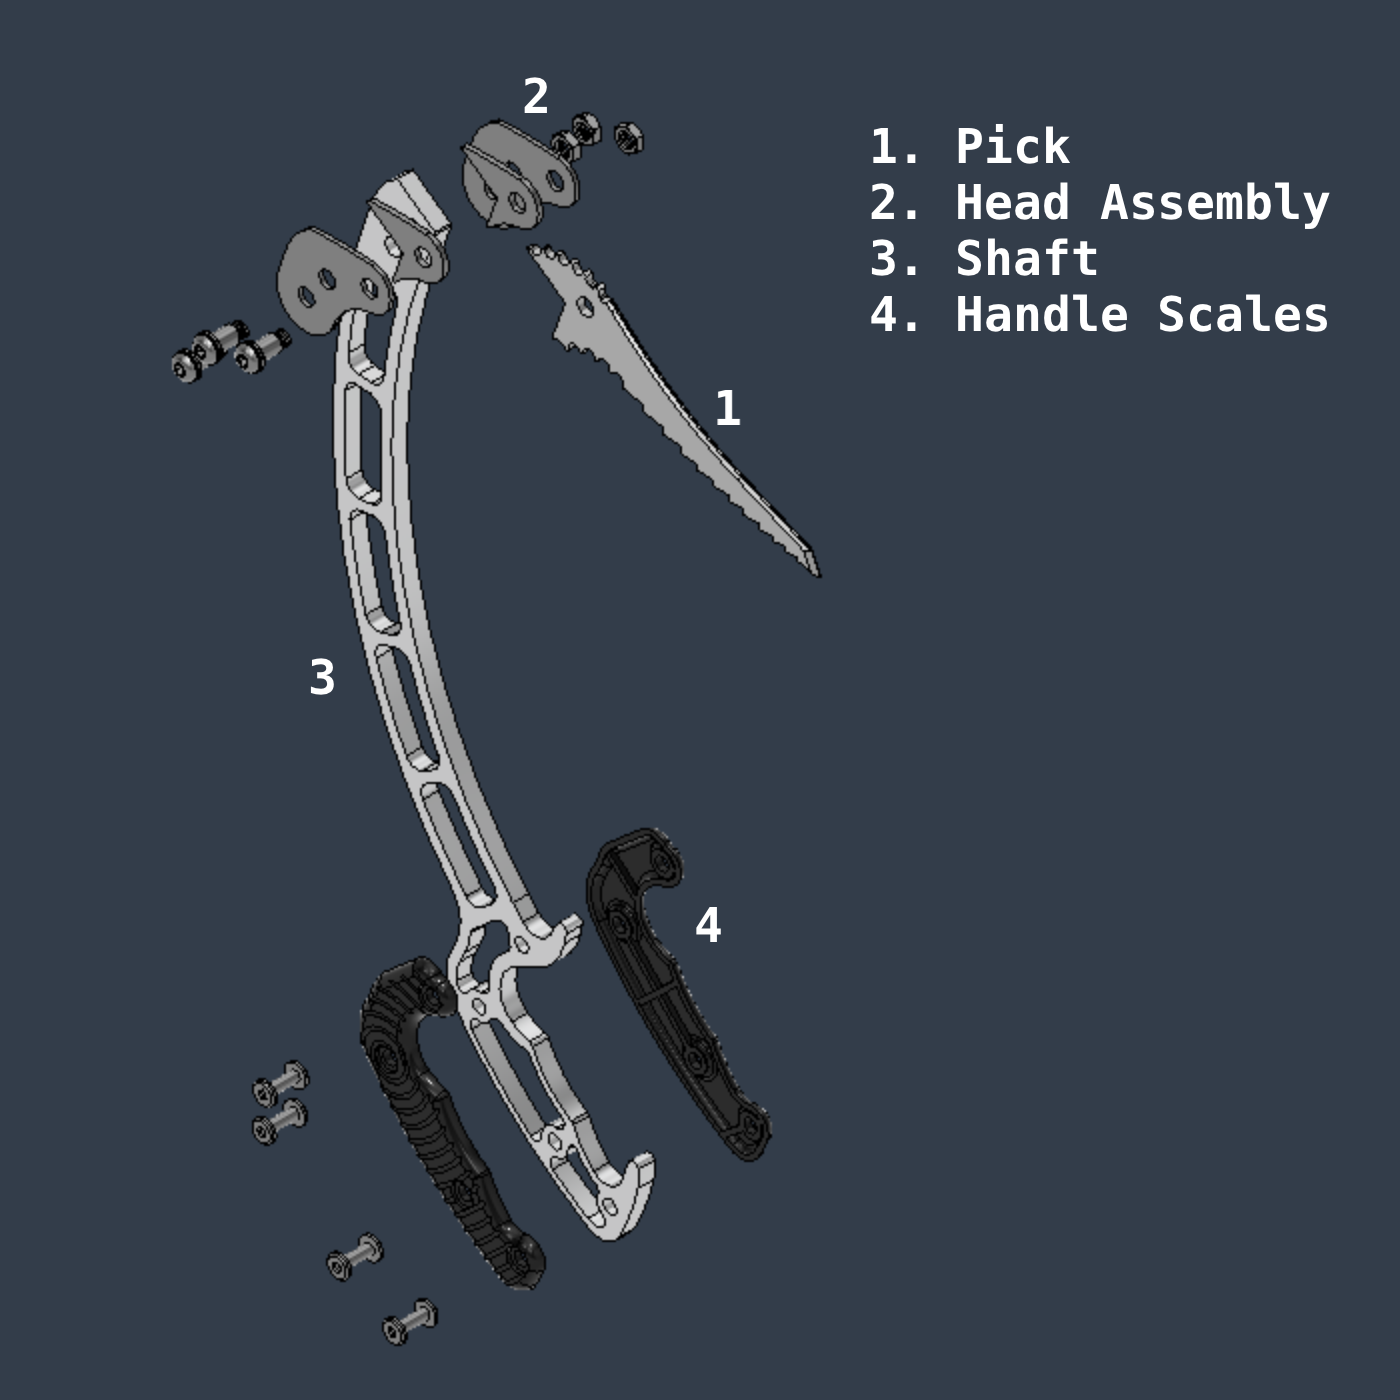
Material Selection
- Shaft: Comprising the majority of the volume of the tool the handle must be strong but lightweight. Materials with high strength-to-weight ratios are ideal for this application
- Aluminium 6061 T6
- Pick: Must be able to support the climber’s weight on just a few mm of surface area while also being able to hold an edge while cutting into ice. Heat-treatable steel allows the durability and strength to be tuned while not becoming too brittle
- 1095 High carbon steel heat treated to 50RH
- Head assembly: Must be strong enough to support the pick
- Mild steel plate
- Handle Scales: Must be ergonomic and insulating while also lightweight
- PLA
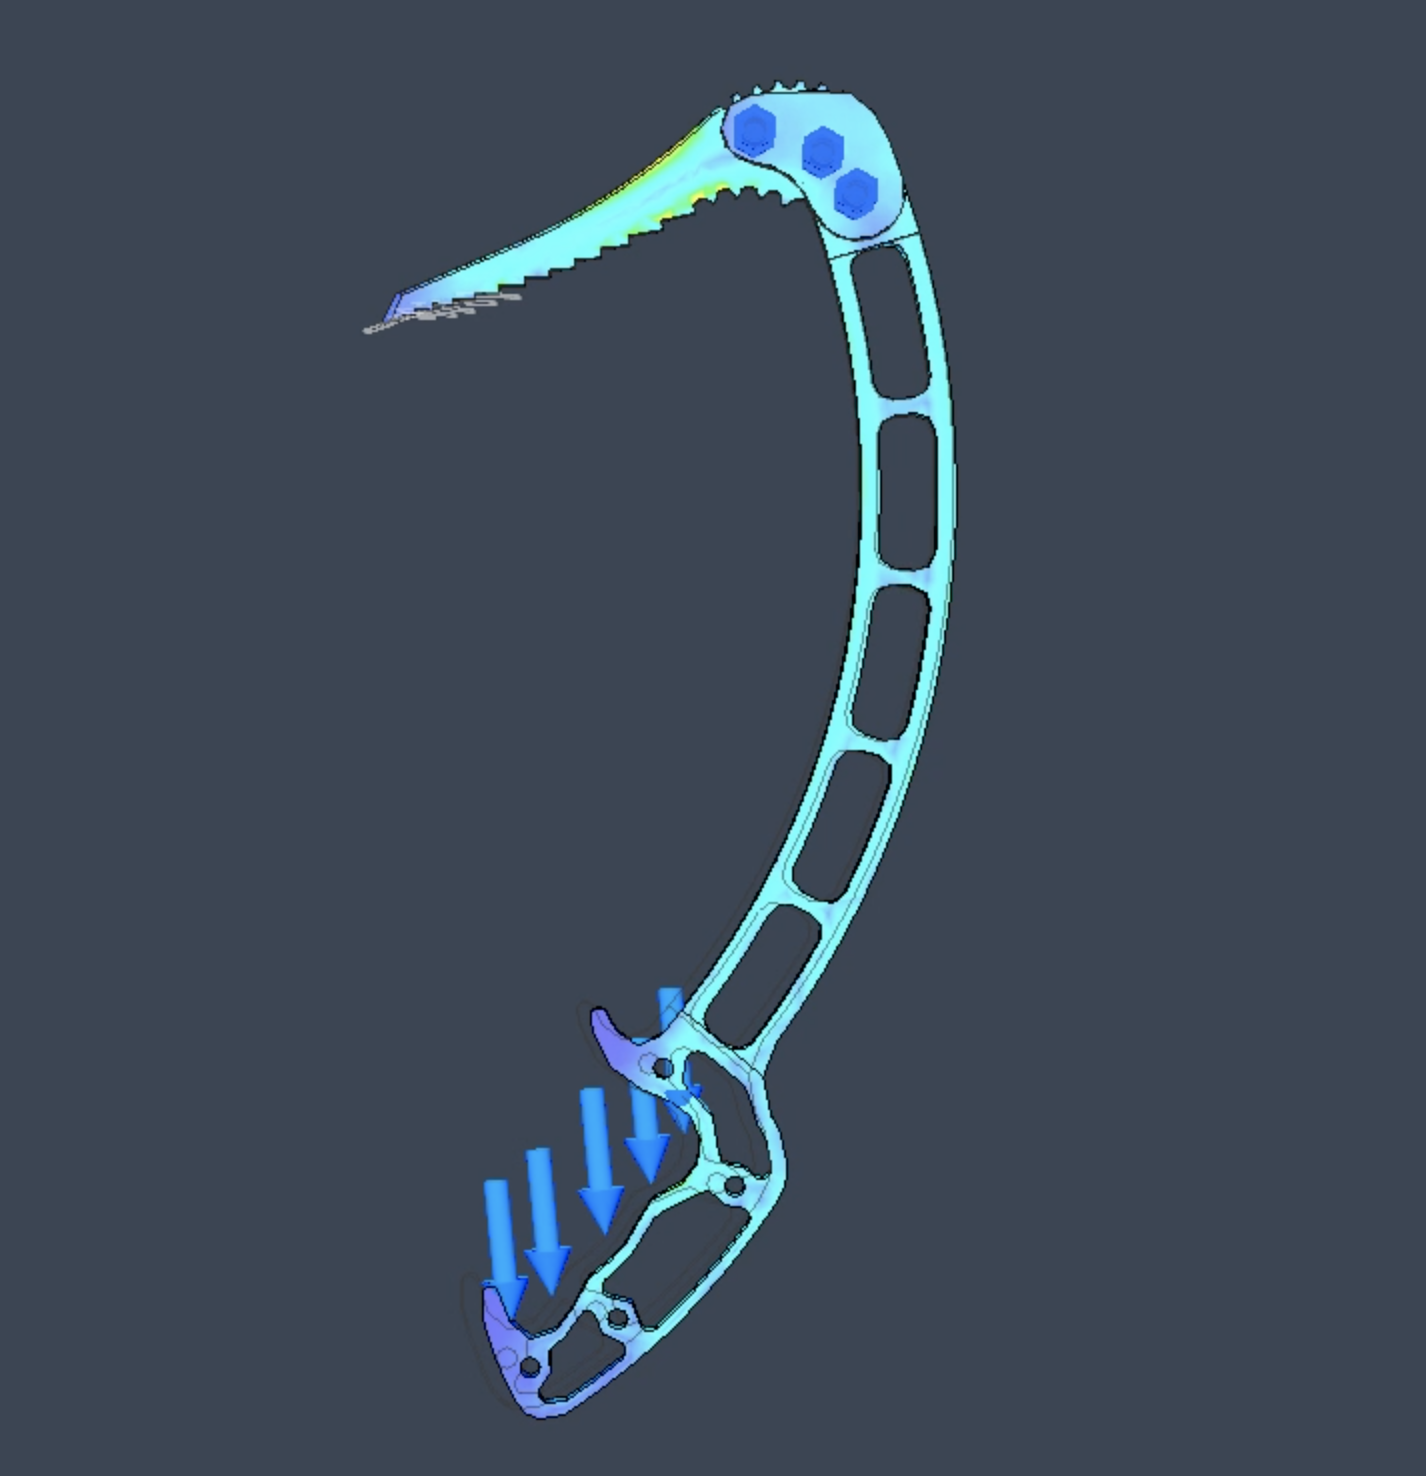
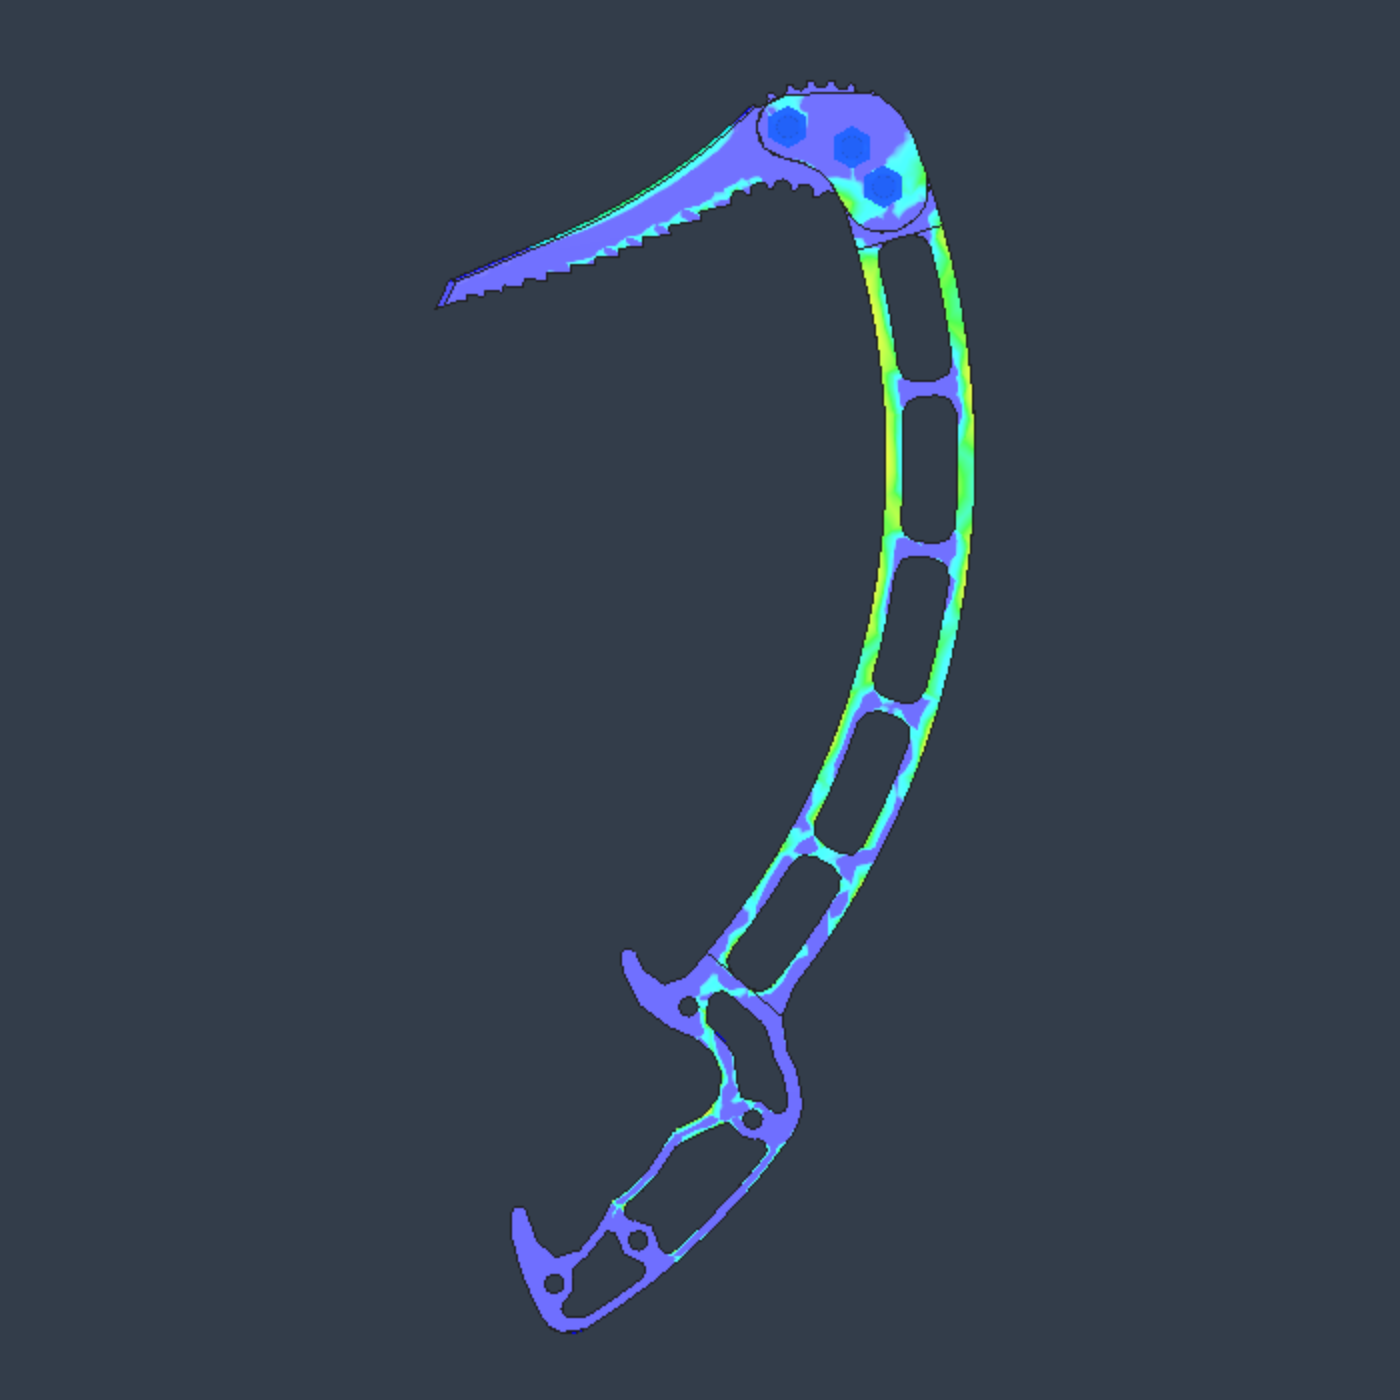
Iterative Design
With geometry, and materials set a full parametric CAD model was created in Fusion 360. Using Fusion 360’s FEA tools simulations could then be run on the design to identify where material could be removed to reduce weight or added back for increased strength in areas of high stress. This process was repeated as the design evolved.
Sourcing materials
Fortunately, all materials for this project were available at local stores or online with minimal difficulty. These included a 21x8x3/4″ aluminum plate, 5/32 1095 steel, fasteners, PLA and more.
Fabrication
The fabrication of the ice tools consisted of 3 main steps: Waterjet cutting, machining and heat treatment.
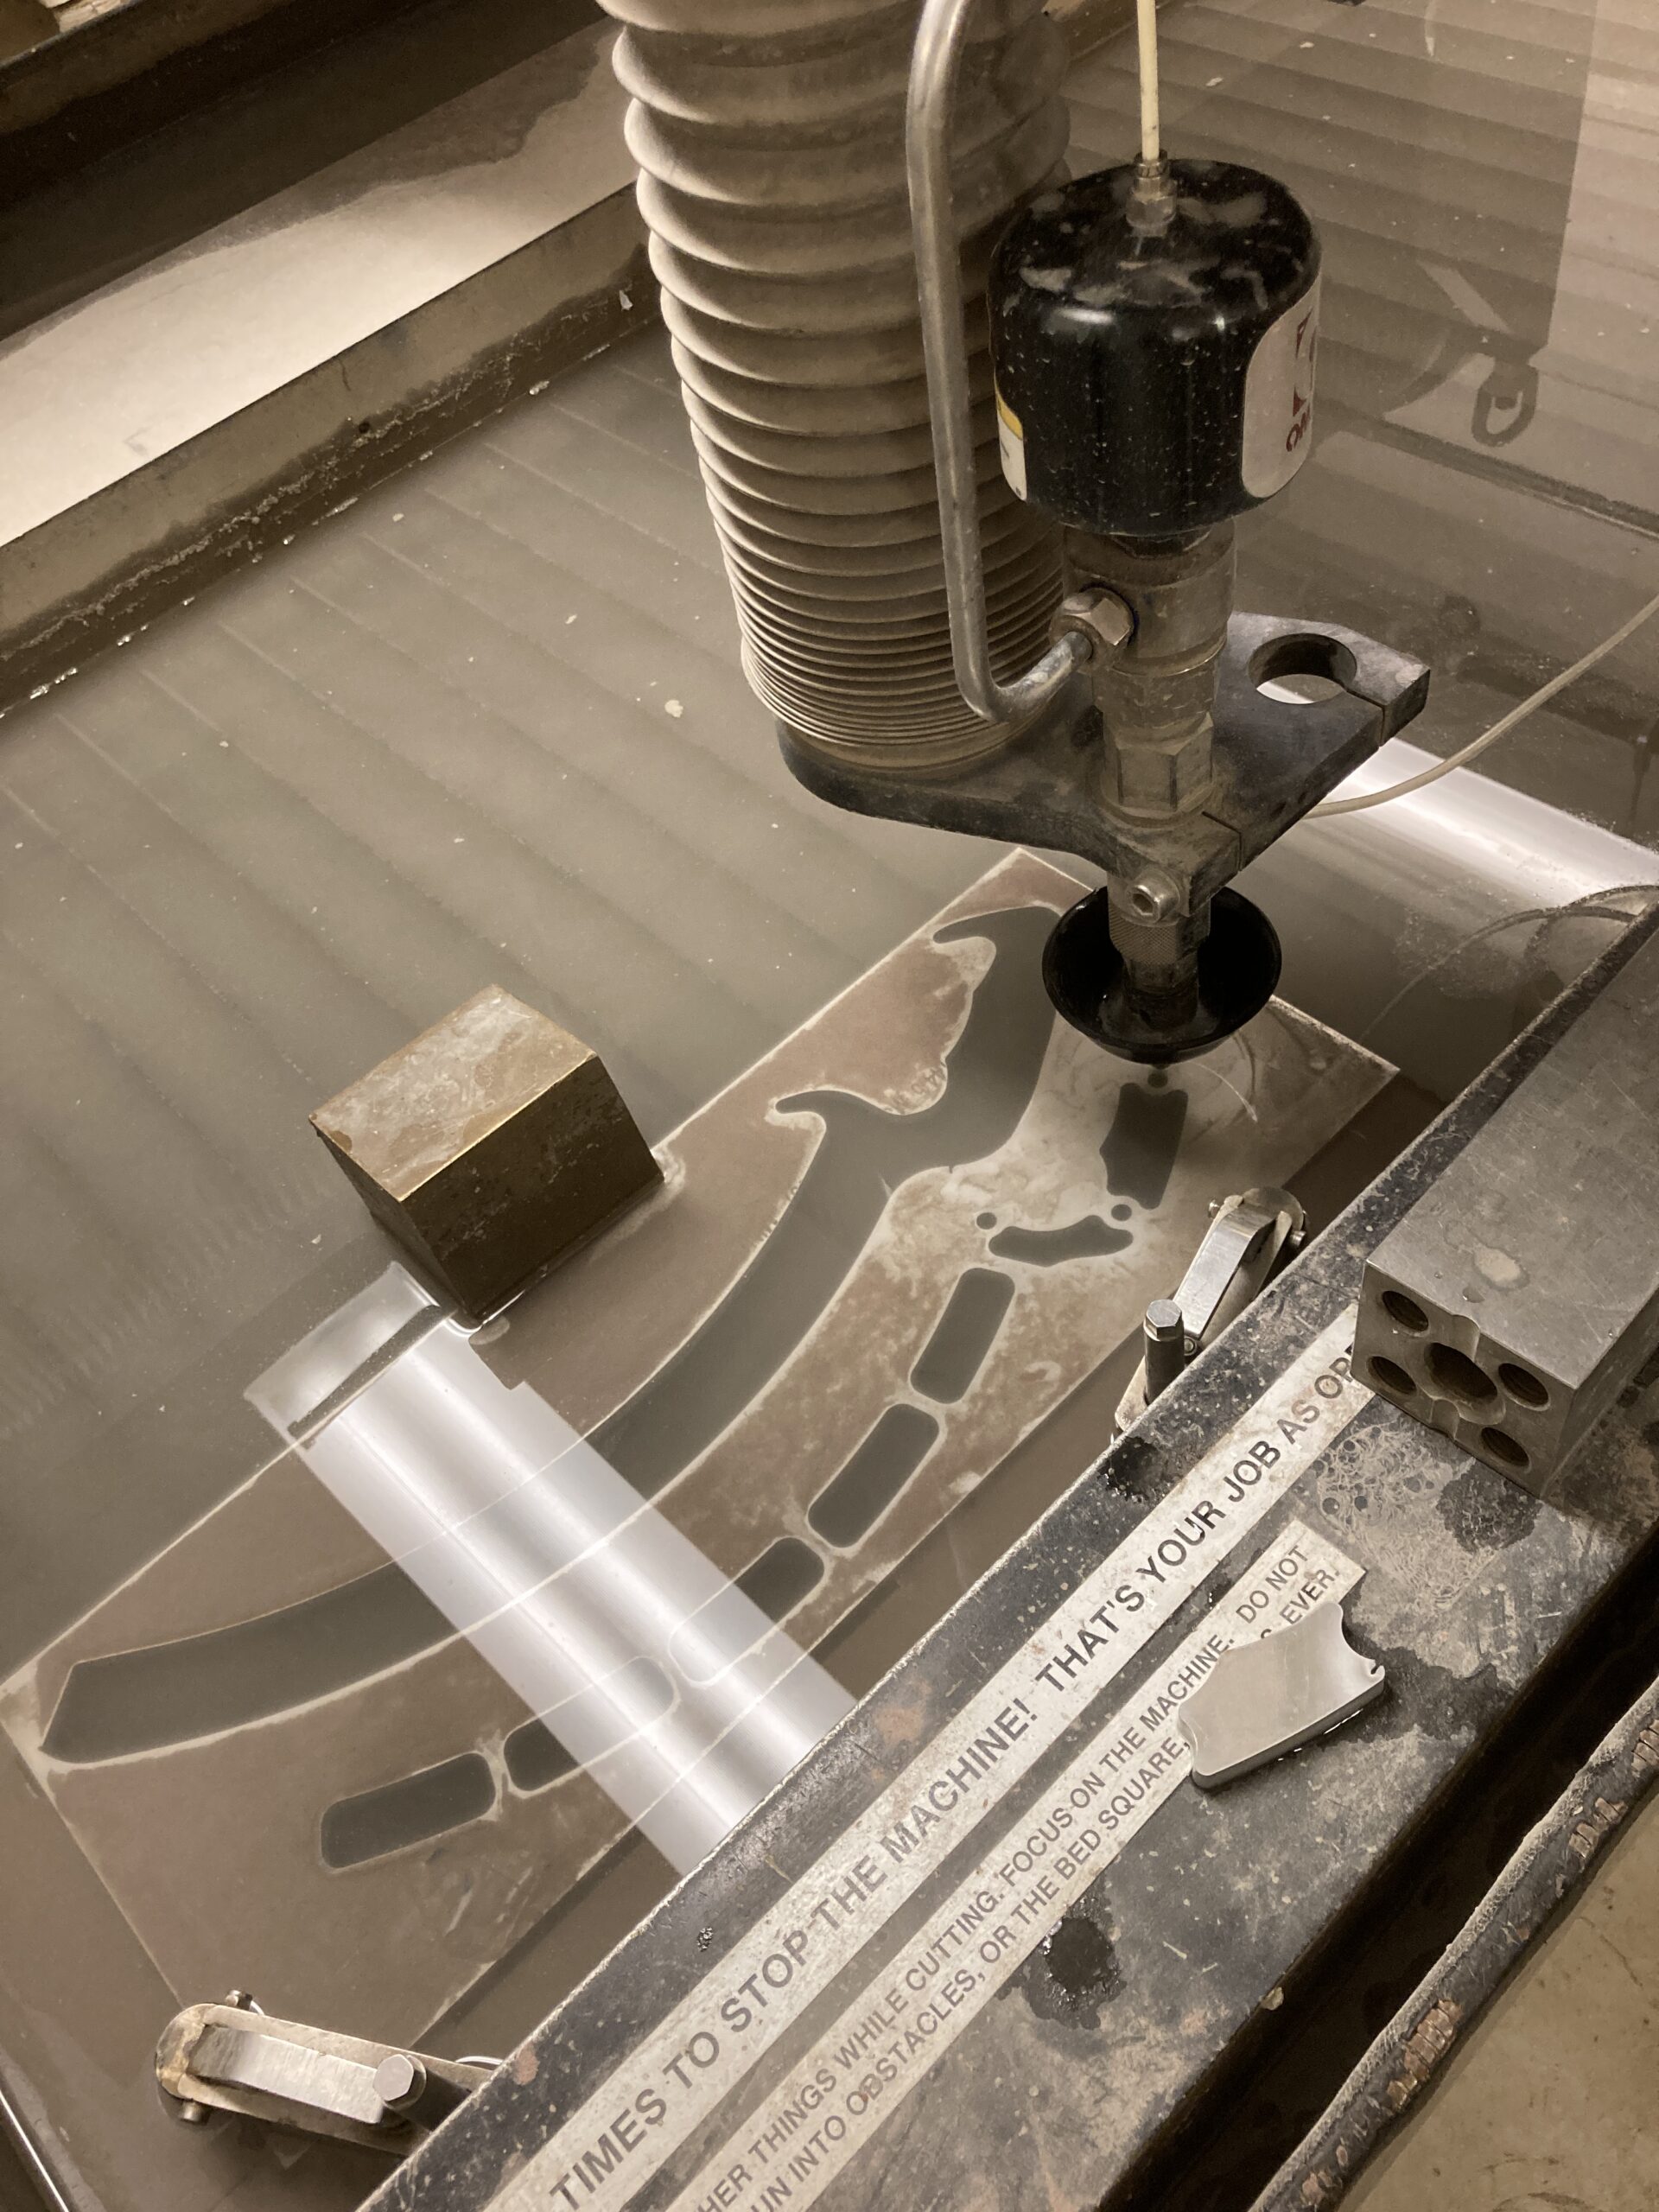
Waterjet cutting
The majority of the geometry of this project was cut using waterjet. This allows for quick and relatively inexpensive fabrication of complex 2D geometries. It is accurate enough for all but the most critical hole geometries in the design.
Machining
A drill press was used to ream holes to size and drill higher tolerance holes in the water get parts. For the pick, a belt sander was used to chamfer and sharpen it to the desired angle.
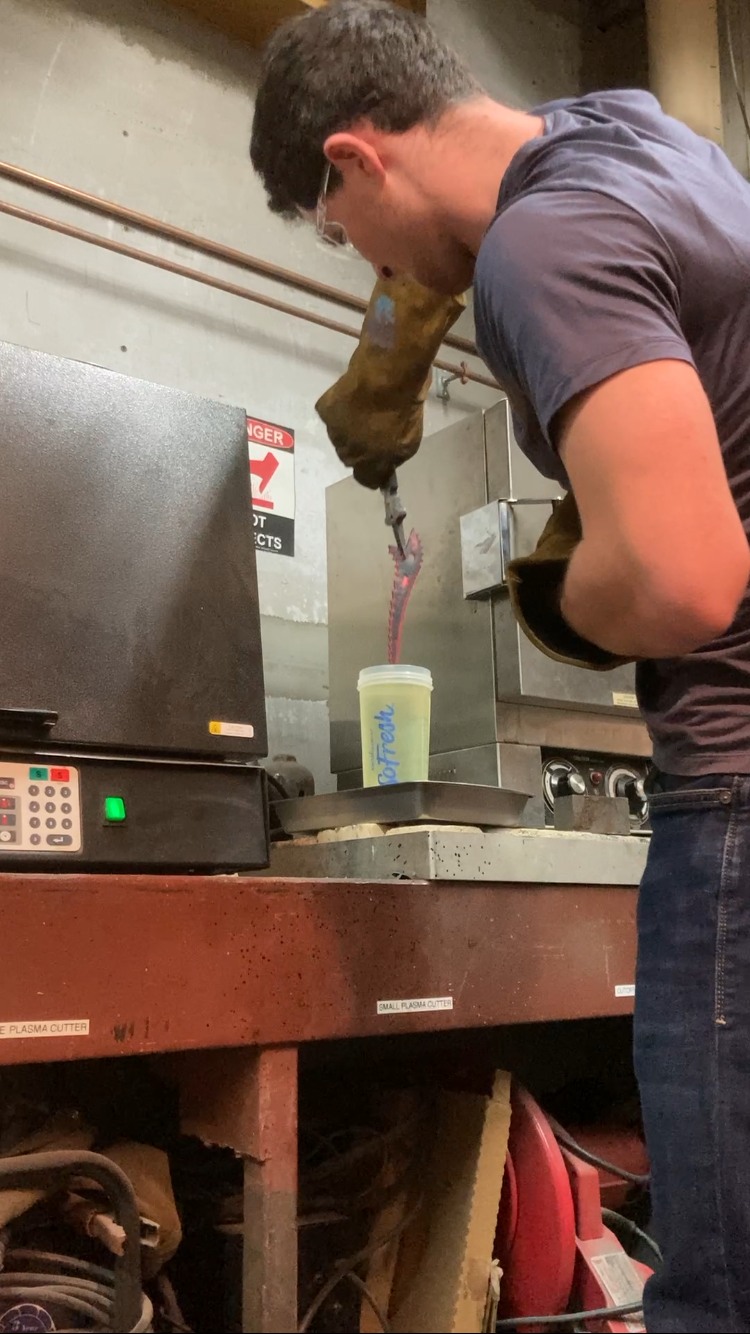
Heat Treatment
To achieve the strength and resilience needed for the pick of the ice tool while maintaining its ability to be sharpened the steel needs to be heat treated to 50RH. This involves normalization, quenching and annealing
- Normalization – The steel it is brought above its curie point of 1450° F and then let to cool in still air. This is repeated up to three times. Normalization helps relieve internal stress in the material and ensures the material starts the heat treatment process in a softened state.
- Quenching – The steel is heated to 1475° F and held there for 15 minutes. Next it is quickly submerged in quenching oil to quickly drop the temperature below 250° F. Quenching causes the steel to develop a fine crystal structure making it very hard, but also very brittle. At this point the picks are at 60 HR.
- Annealing – The steel is heated to 650° F and held there for 2 hours. This allows the grain structure to grow somewhat, reducing the hardness of the steel but also making it less brittle. After annealing, the picks are at the desired 50 HR.
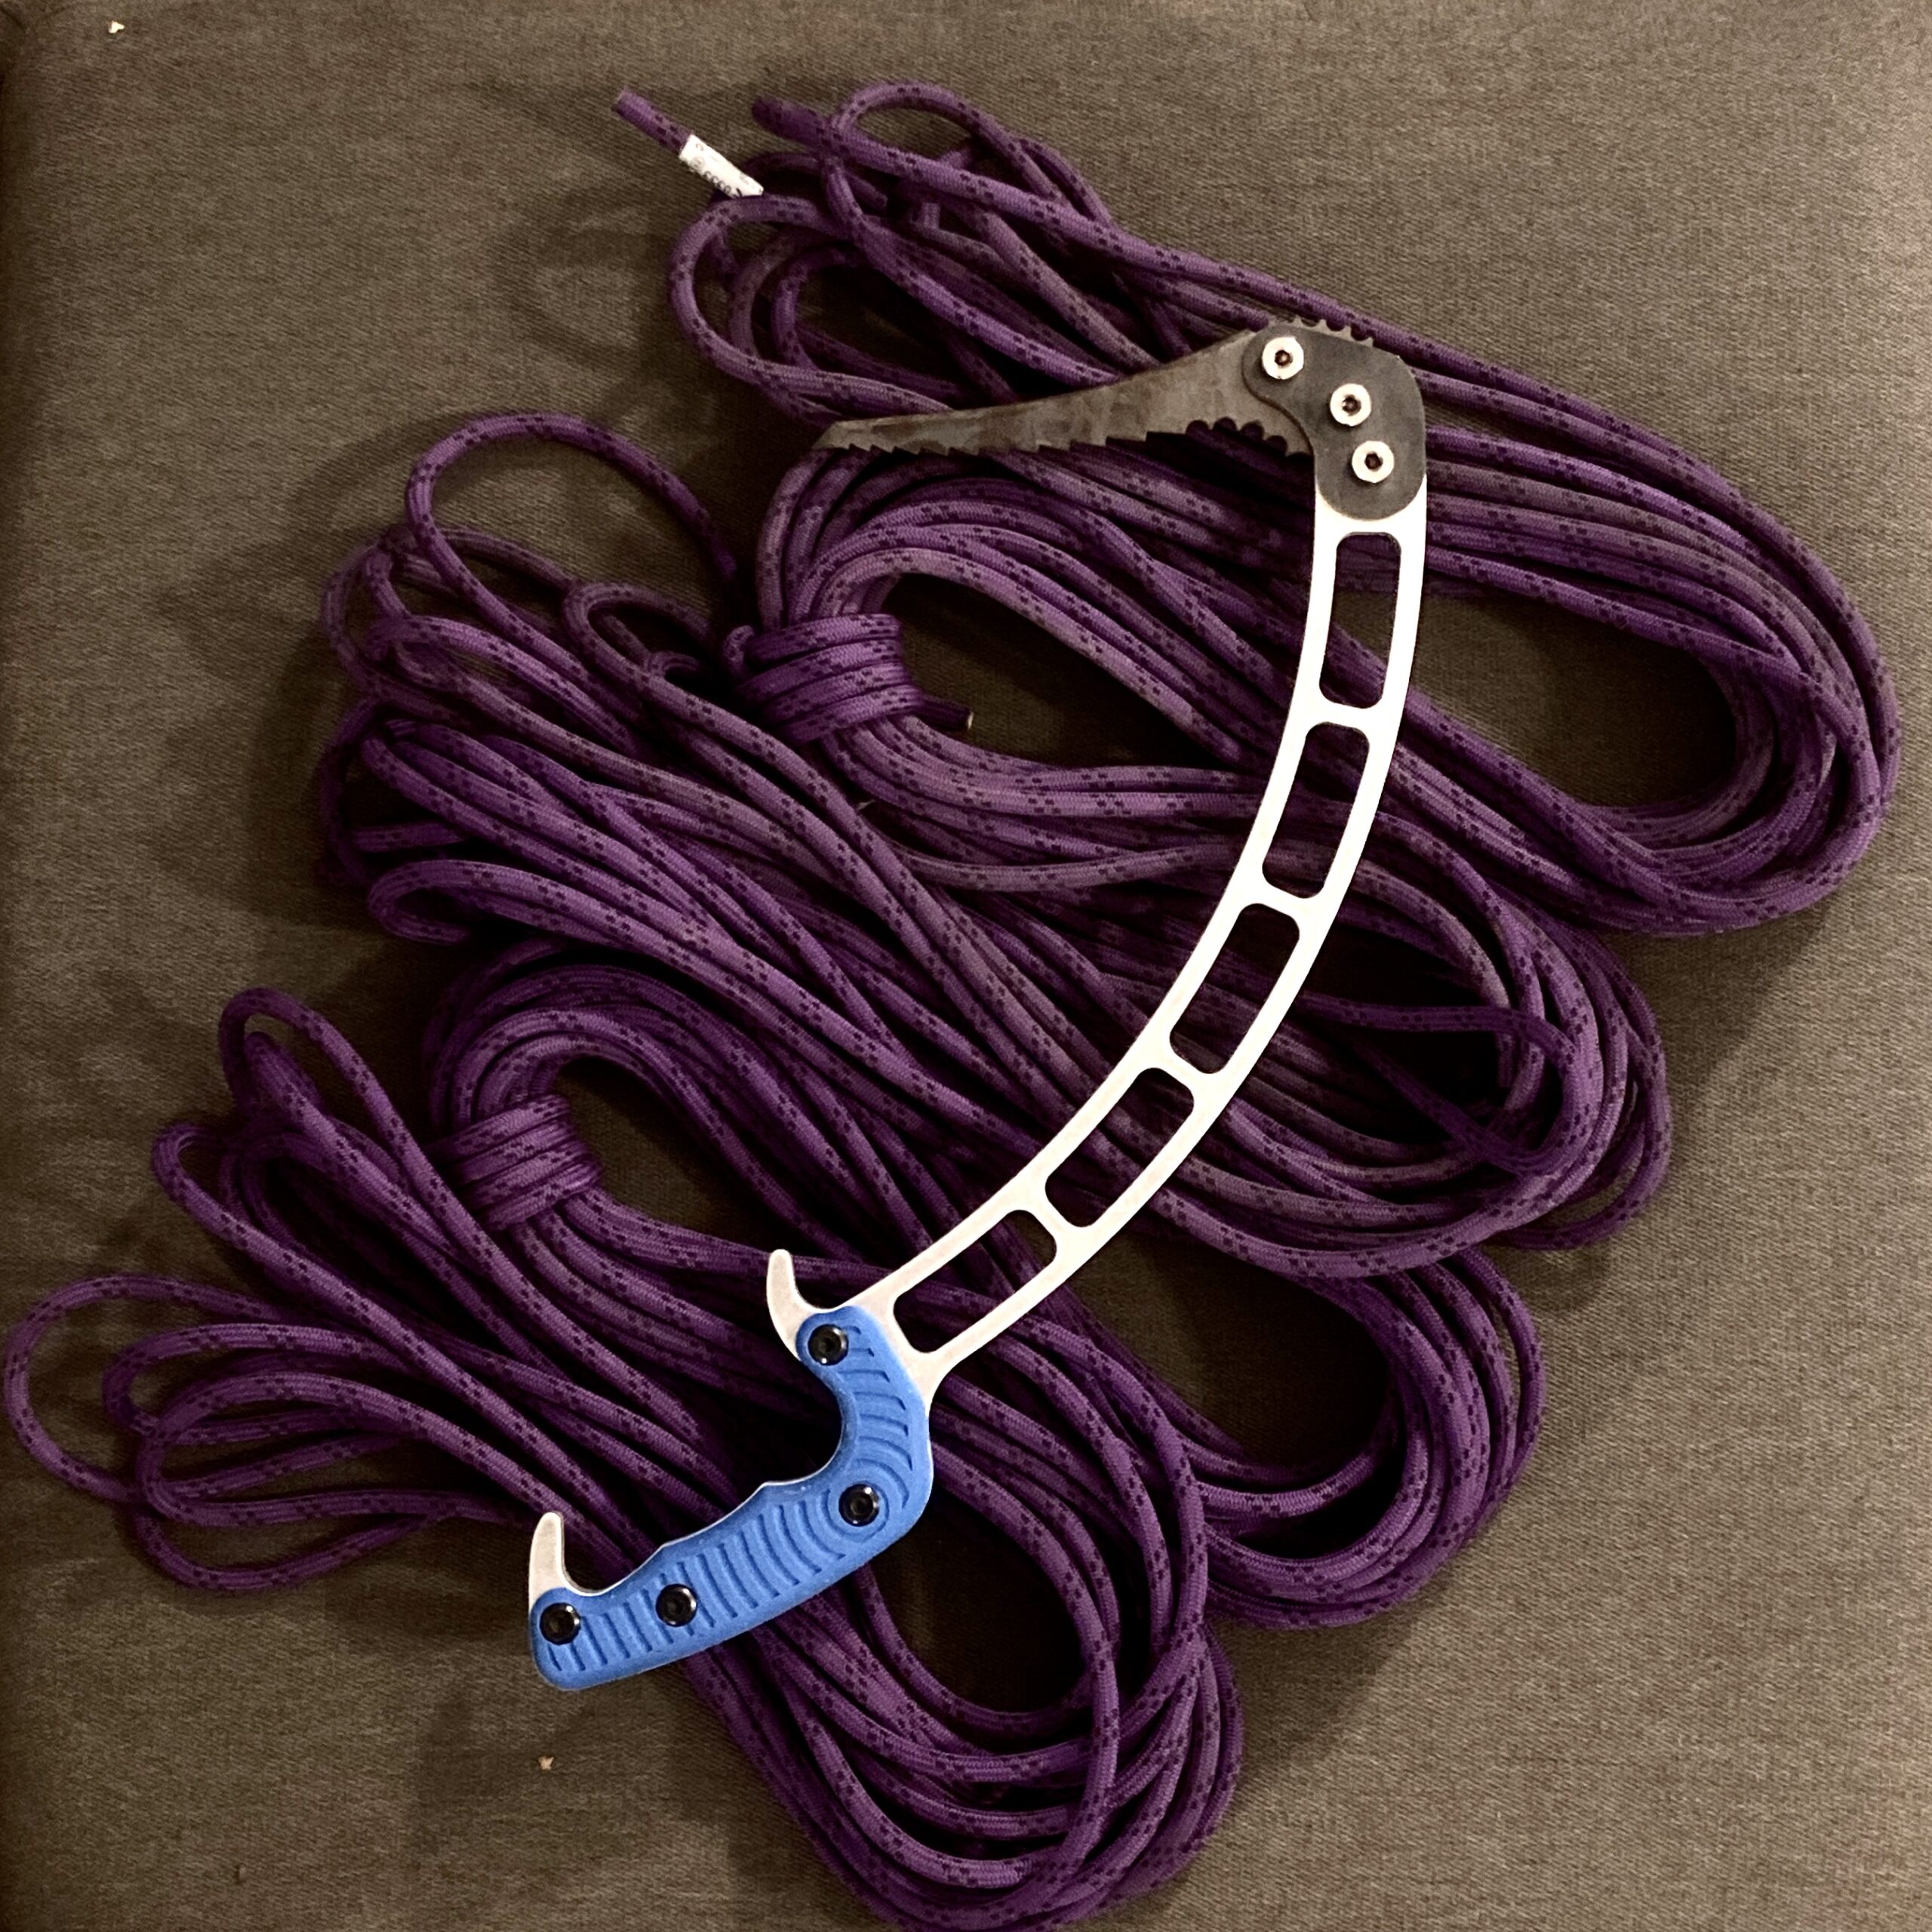
Final Touches and Assembly
With all the metal components finished an ergonomic and insulating handle was 3D printed and all the components are assembled. High strength shoulder bolts are used for the head assembly while binding posts are used for the handle. Both ice tools are assembled and are ready for use… After climbing on the tools I am super happy with how they perform. I think I can improve the geometry of the picks for a future iteration and I am looking to add some vibration dampening material to the handles to improve the “stick” of the tools into the ice.